


Xstamper Re-Inking Instructions
We strongly recommend using only Xstamper® Refill Ink to re-ink your Xstamper pre-inked rubber stamp. It has been specifically formulated to flow cleanly through the micropores of the Xstamper laser-engraved rubber. Using ink other than Xstamper Refill Ink can clog these micropores and void the Xstamper warranty. Follow the directions below for your respective Xstamper mount. After re-inking, please allow stamp to sit up to 24 hours to reach maximum saturation.
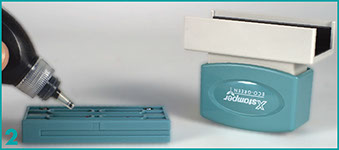
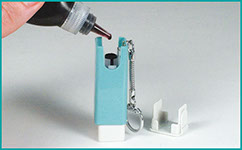
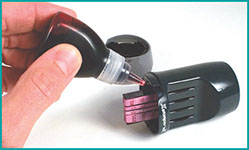
Remove the handle and place 2-4 drops of ink in the openings on either side of the spring as shown.
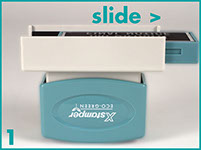
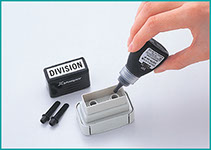
Slide the impression cartridge out of the handle. Place 2-3 drops of the same color ink in each of the 4 openings as shown.

x
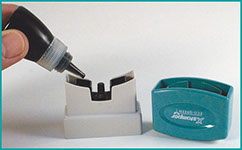
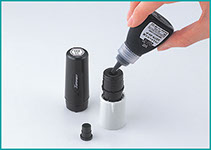
Slide the impression cartridge out of the handle. Place 2-3 drops of the same color ink in the opening as shown.
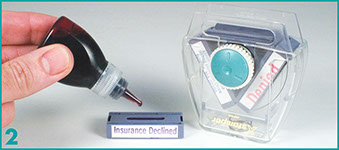
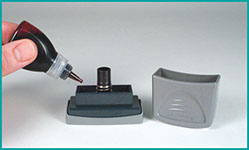
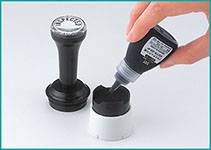
Remove the handle and place 2-4 drops of the same color ink in the opening in the center of the mount.
x
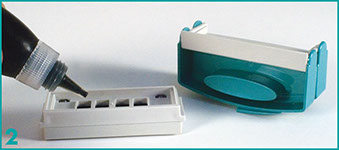
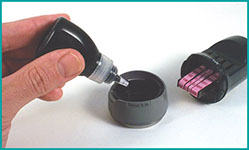
Slide the impression cartridge out of the handle. Place 2-3 drops of the same color ink in each of the openings as shown.
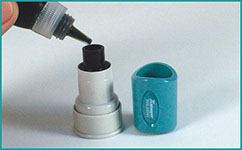
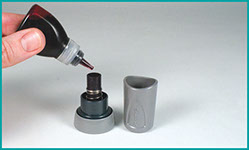
Remove the white cap on top and place 2-4 drops of the same color ink in the opening in the center of the mount.
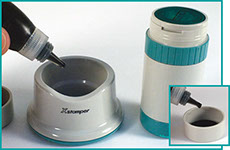
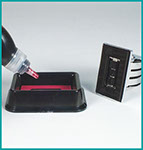
Put a few drops of the corresponding color ink in the XpeDater base and a few in the travel cap as needed.
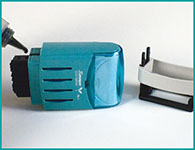
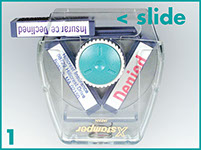
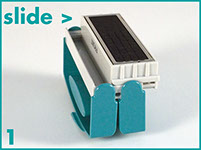
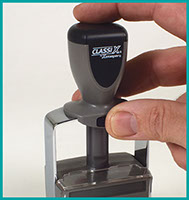
Firmly hold the teal handle and the white Impression FrameTM and pull apart. Use the corresponding color ink cartridge to put 2-3 drops of ink into the inking hole. Put 2-3 drops into each opening on the frame as well.
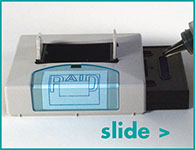
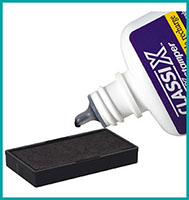
Put a few drops of the corresponding color ink into the stamp base.
Xstamper vX Re-Inking Instructions
To re-ink Xstamper vX® message stamps, remove the handle and place 2-4 drops of the same color Xstamper® ink in the openings as shown. Allow ink to absorb overnight for best results.
To re-ink The Xstamper vX® date stamps remove the Base and place 2-4 drops of the same color Xstamper® ink in the cap pad, and 2-4 drops of the same color Xstamper ink in the hole as shown. Allow ink to absorb overnight for best results.
F-Series Re-Inking Instructions
Add about 10 drops of ink.
Add about 5 drops of ink.
Add about 25 drops of ink.
ClassiX Re-Inking Instructions
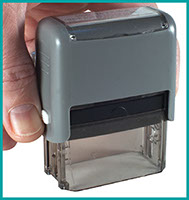
1. First, push down slightly on the top of the stamp and push the white locking buttons on either side of the stamp. This will allow the ink pad to slide out.
2. Second, carefully slide the ink pad out. The inked side of the pad will be on the bottom, take care not to get ink on your fingers.
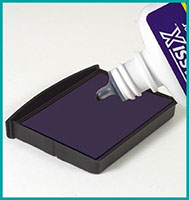
3. Third, put a few drops of the same color ClassiX® refill ink onto the pad. For best results, allow the ink to saturate overnight.
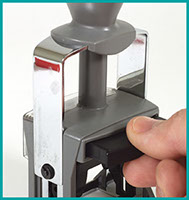
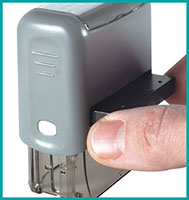
1. First, push down slightly on the top of the stamp and push the black locking button on the front of the stamp. This will allow the ink pad to slide out.
2. Second, carefully slide the ink pad out. The inked side of the pad will be on the bottom, take care not to get ink on your fingers.
3. Third, put a few drops of the same color ClassiX® refill ink onto the pad. For best results, allow the ink to saturate overnight.


Copyright © Shachihata Inc. (U.S.A.) All rights reserved


